I have been drawing on transparencies for the past few days.
This one turned out great. I left off the antenna when I cut it and also cut it like a mask so that I could use it with spray inks and not have such a large border.
This is the fist stencil that I then am able to use as a heart because of the way it was cut.
Thursday, January 31, 2013
Tuesday, January 29, 2013
Goody QuikStyle
- Check out the Goody website for more information :
- Or you can go to the Goody Product Page:
- The Facts: The Goody® brand is part of Newell Rubbermaid®’s Home Solutions Business Unit. More than 100 years of innovation has made Goody the most widely-recognized manufacturer of hair accessories and styling tools in the world. Through proprietary brands such as DoubleWear™, QuikStyle™, Simple Styles™, Slide-Proof™ and Ouchless®, Goody has introduced smart innovations like the exclusive Spin Pin and QuikStyle Brush. With products inspired by the latest designer trends and innovative solutions, Goody offers an inspiring range of hair accessories and styling tools. Goody and Newell Rubbermaid are headquartered in Atlanta, Georgia.
- PRODUCT FEATURES:• Absorbent microfiber bristles remove 30% of water for faster styling
• Antimicrobial microfiber keeps the brush fresh
• Side Vents for maximum air flow
• Lightweight design to reduce hand fatigue while drying
• Ergonomic handle is textured for extra grip - SPOTTED : $12.99 at Walmart, Target, CVS, Walgreens, Kroger, Duane Reade
- Disclosure: I received this product complimentary to test through Influenster’s VoxBox program
Monday, January 28, 2013
Views of my Art Journal
This one is the one I completed Saturday Night. I used Range Adirondack Paint Daubers for the striped background. I also used them to patina the frame around the clock. I used a Faber-Castell Big Brush Pen in Red with my handcarved chevron stamps. I used a set of stamps from Michael's for the words and the clock. The clock background was from a "guest check" and covered with Ranger Distress Ink in Vintage Photo. Next a Bic Chisel Tip Marker was used to out line everything in black. Lastly a White-Out pen was used to add highlights to the page to finish it off
Labels:
art,
completed,
inspiration,
journal,
quotes
Saturday, January 26, 2013
Free Printable Journaling Cards Set 2
I am excited to share with you the second set of free printable journaling cards that you can use in all of your scrapbooking and project life projects. I hope that you like these. I will be releasing a new printable each Saturday so make sure you follow through GFC so that you will know as soon as it goes live. Please pin from this page and not from the Scribe Site. If you use these I would love to see what you do with them.
Labels:
downloads,
Freebies,
printables
Friday, January 25, 2013
Views from my Studio
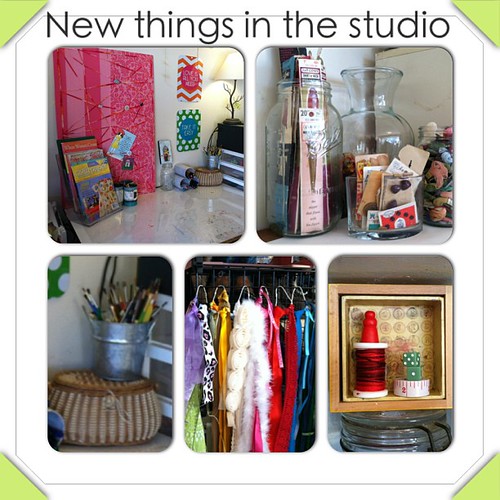
Here is a peek into my studio. I am working with a new bookshelf that we put into the space on Wednesday and I have spent all day yesterday working on it. I am enjoying how it is turning out.
I used metal shower curtain rings to organize my ribbon by color and it is hanging in the side of my wire shelving unit.
I wanted to keep my vintage supplies together so I have displayed themin glass jars and containers. The large vase in the back has some small scrap balls of yarn. I thought that this would be a great way to display it so that I could see what I had and be able to use up what I have. The large mason jar is full of vintage zippers that I found at a local yard sale.
I am not very good with assemblages but I thought I would like to try my hand at a small one.
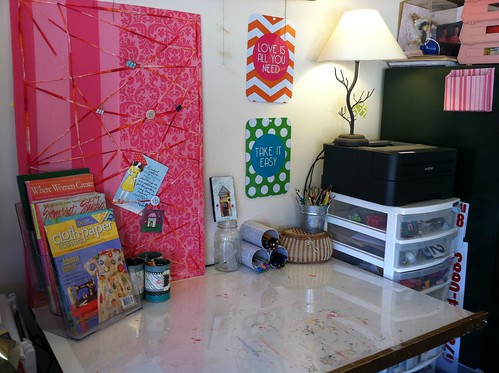
Here is a view of one of my worktables. This is a drafting table that was my aunt's. I really need to add something to my inspiration board. I took everything off when i was moving things around.
Labels:
inspiration,
studio
Thursday, January 24, 2013
Art journaling fun
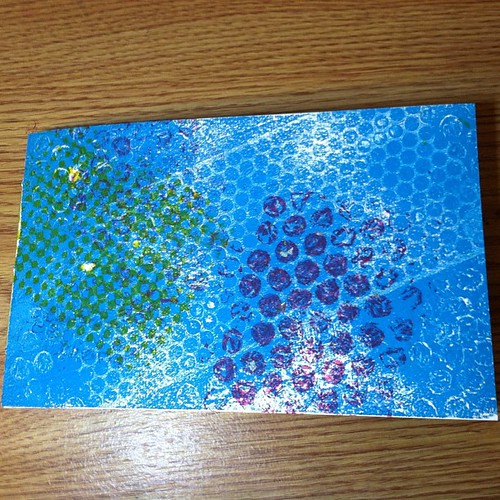
This is an art journal that I have made out of one sheet of watercolor paper. I made 3 signatures and I plan on finishing them prior to binding them into a cover. This signature I created the backgrounds completely with my Gelli Arts Gel Printing Plate. It was a very quick project and this gave me paper that has lost of texture and color to begin with.
Labels:
art,
inspiration,
journal,
tutorials
Wednesday, January 23, 2013
Etsy Packaging Tutorial
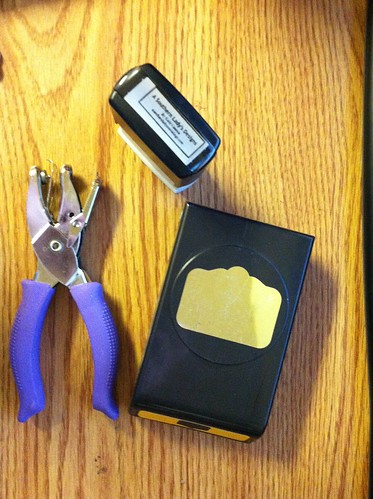
Supplies:
- Ek Success tag punch
- Mini hole punch
- Stamp (custom stamp from VistaPrint)
- Brown Kraft Paper
- Wrapping Paper (this paper was made with my Gelli Arts Gel Printing Plate)
Monday, January 21, 2013
ModCloth Sponsor Post
Ready to update your look for the new year? Then it is time to catch the fever, as in the ModCloth Cabin Fever Sale. For a limited time you can get 70% off great styles from ModCloth during their annual Cabin Fever Sale. Supplies are limited so grab your favorites today before they are gone!


Labels:
Sponsors
Saturday, January 19, 2013
Stella & Dot Sponsor Post

New Year. New Trends. New You! I'm so thrilled to share with you that Stella & Dot has launched their new Spring Collection! The entire line is stunning but below are a few of my absolute favorite pieces.
The Fiona Bib Necklace is a favorite amongst the Stella & Dot design team and I can see why. This luxurious necklace was designed with segments of luminous ivory that create a crisp, modern statement. The Zinnia Bracelet is perfect for spring. Kelly green cabochon stones line a vintage-inspired bamboo link bracelet that will be sure to add a pop of color to any outfit. Stella & Dot's Seychelles Chandelier Earrings are beautiful. The teardrop chandeliers feature bold lapis stones and hand-painted turquoise enamel. Don't miss your chance to shop this great new collection. Have a stylish 2013!
Labels:
Sponsors
Free Printable Journaling Cards Set 1
I am excited to share with you a free printable journaling card set that you can your in all of your scrapbooking and project life project. I hope that you like these. I will be releasing a new one nest Saturday so make sure you follow through GFC so that you will know as soon as it goes live. Please pin from this page and not from the Scribe Site. If you use these I would love to see what you do with them.
Labels:
downloads,
Freebies,
printables
Thursday, January 17, 2013
My CHA Project
Today I want to share my that I created for I Love To Create. This project was in there booth at the CHA Winter trade show (the Craft and Hobby Association ) this past weekend. I am so excited to be sharing this with you. I have been waiting until I could. I created this back in October and now you can find the instructions by clicking here.
This is a quick project that can be completed in under 8 minutes.
I hope that you enjoy it. the basic instructions can be used for various motifs of your choice.
This is a quick project that can be completed in under 8 minutes.
I hope that you enjoy it. the basic instructions can be used for various motifs of your choice.
Quaker Real Medleys Oatmeal
I received this product complimentary from Influenster
You’ve never seen oatmeal like this. Packed with wholesome multi-grains and chunks of real fruit and nuts – delicious walnuts, sweet apples, and tasty cranberries, Quaker Real Medleys Apple Walnut Oatmeal+ is an oatmeal experience beyond your expectations. It comes in a convenient, portable package so you can eat it anywhere! It’s so easy to make… Just add water and microwave. No mess, no bowl to clean up.


Wednesday, January 16, 2013
Painting Number 2
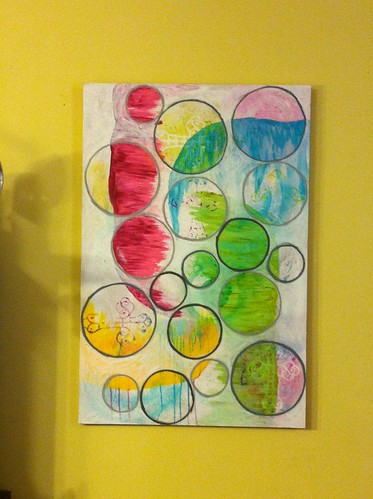
I still feel like this painting is a work in progress. I don't know what it is yet but I believe that it needs something else. I am thinking about adding more white around the outside of each of these circles to make them pop a little more, but I do like the way it is transparent and that you can tell the background is under it all.
Labels:
art,
completed,
inspiration,
tutorials
Tuesday, January 15, 2013
Sponsor Shout Out January

The Fat Quarter Shop is at it again with the fifth annual Designer Mystery Block of the MonthTM featuring their favorite designers. This year, they will showcase a vintage sampler quilt with traditional blocks full of color and style! They have kits avaliable and this is what you will receive:
- 12 different sampler blocks featuring the Vintage Modern collection by Bonnie & Camille for Moda Fabrics.
- Each block finishes at 12" and will be an easy to intermediate pieced block (no templates, applique or paper piecing),
- Block of the month suitable for all quilters.
Labels:
Sponsors
Sunday, January 13, 2013
Step by step Painting part 3
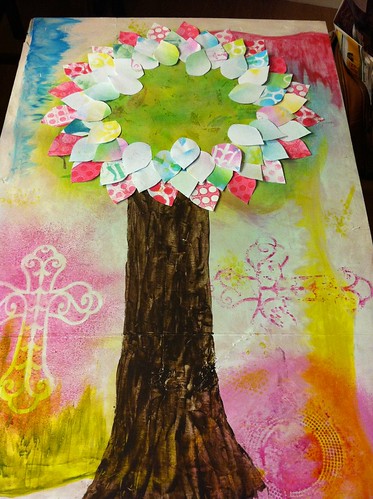
I got going good at this point and I forgot to take a picture of the trunk as I was painting. But on this step I used a palette knife to create the trunk of the tree and I used Mini Misters by Ranger with Golden Green Gold to create the impression for the top of the tree.
I then cut leaf shapes out of paper that I have painted with my Gelli Arts Gel Printing Plate. Once I had created the first leaf shape I used it as a pattern to create the rest of the leaves.
I then placed the leaves around the shape of the treetop just inside the edge of the painted top. After getting them how I liked them I picked them up in order and started adhering them down with Modge Podge.
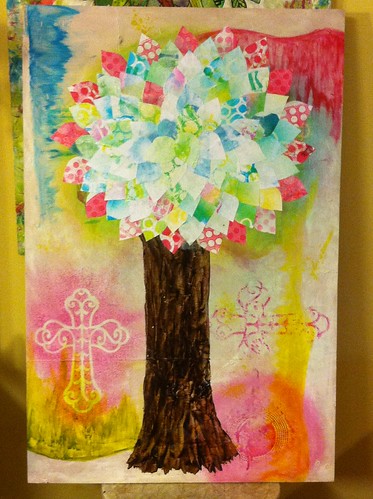
Here is the finished piece after all the leaves have been adhered down.
Labels:
art,
completed,
in progress,
inspiration,
tutorials
Friday, January 11, 2013
Step by step painting Part 2
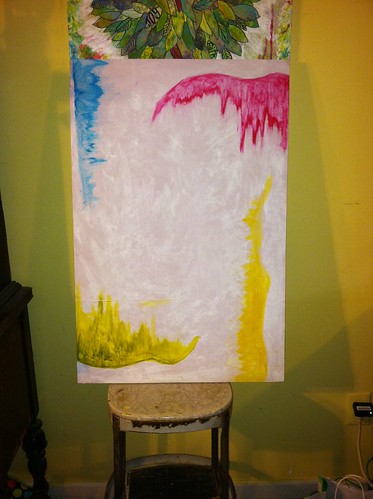
Yesterday's post left off with the background in just the beginning stages. Today I will show you how I added texture and depth to the background.
Labels:
art,
in progress,
inspiration,
tutorials
Thursday, January 10, 2013
Step by step painting part 1
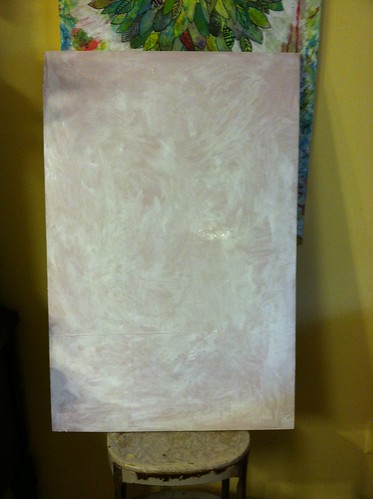
Step 1: I used my hand to spread a thin layer of gesso over the surface of the wood panel. The panel had been painted over with leftover house paint so that it would be less absorbent, so the gesso will help the acrylic paint to move better on the surface at later stages. I really like to apply the gesso in this way because is begins to build texture in this very first layer. (I used a spray bottle filled with plain water to help spread the gesso very thin.
Labels:
art,
in progress,
tutorials
Wednesday, January 9, 2013
Inky Fabric Keychain Giveaway
This giveaway is open for US residents only, ages 18 and over. You can enter via the rafflecopter form below.
a Rafflecopter giveaway
Labels:
giveaway
Tuesday, January 8, 2013
More Smashbook Fun
I posted last week where I was auditioning some Elle Studio numbers on the pages to create a monthly journal page for this year. After I took the pictures of these layouts I found another set of smaller numbers in my stash and these are the ones that I ended up using and creating a 2 page spread for the month of January. This is the Handmade Layers Number Cutouts and they came on one sheet and I had to cut the out and then I just arranged them on the page in a way that left me open spaces for the ones that were just numbers.
I then used the Smash Pen to draw around the individual squares and for some of the numbers there was no where to write for that day I drew out the square to give me more space to write. I then added the days to each number and a little bit of doodling the make it meld with the page. I used a letter stencil for the month and the year numbers is from a set of Making Memories Rub-ons.
I added a few doodles with the Smash Pen to the first page because this is a blank page.
I used the smash pen to draw around the embossed designs on the front cover and then I used my set of Pentel color pens which are fine point markers that have a very rich color lay down.
Smashbooks are a great way for you to begin to keep a visual journal so that you do not have the fear of starting with a white page. Each page has your background ready for you to add you own twist to it.
Labels:
inspiration,
journal,
tutorials
Low Entry Giveaway Party
Thank you for visiting my blog. I hope you take a look around. Add you link and choose a few to enter, someone has to win, right. IT could be you.
The Rules:
- Please only link up your giveaway here and not your projects.
- Any link that does not include a giveaway will be deleted.
- Please be follow me via GFC
- Please add my button to your sidebar so that everyone will know where you found this linky (not mandatory but appreciated)
Sunday, January 6, 2013
Thursday, January 3, 2013
Smash Book Play
This is my first post with my new iPhone and so I would like to share a few pages from my smash book. I was auditioning the Ellie's studio vintage mix and match numbers in green to see if I could make a daily journal with them on only a few pages. In the end I think I will just use the to date the pages as I go.
Labels:
2013,
art,
Art journal,
inspiration
Subscribe to:
Comments (Atom)


