Friday, June 28, 2013

Etsy Shop Update

I have made a long awaited update to my Etsy shop.
I have added digital kits and elements to my shop that you will be able to immediately download when you make your purchase.

I have two collage element kits and you can purchase the individual sheets as well. Each of the digital kits and elements were created with my original artwork and can be printed for use on various project such as art journaling and gift packaging. It can also be used for digital scrapbook layouts


Thursday, June 27, 2013

I'm Back

We spent two weeks at camp and I now we are back. I hope you enjoyed the two weeks of post that I had planned. It has been a slow go getting back in to the routine of going to bed at a normal time and being able to sleep late it we want. The girls are really taking advantage of the sleeping late part, me, well not so much. I am such a night owl but no matter what time I go to sleep my body seems to wake up at 7:40 am everyday. This gives me plenty of time to get a few things done around the house before the girls are up an about. I want to share some pictures of our two weeks at camp with you today. I have been busy compiling them into scrapbook pages so that I can hopefully get them into a book before the summer is over. I have a couple of ideas in mind on how I want them. I will be sharing them here soon.
Well without further ado here are the layouts: 


Wednesday, June 26, 2013

Sheaves for Christ #Art Print #Sale


My daughter is selling these to help her reach her $1000 goal for Sheaves for Christ. You can find out more information about Sheaves for Christ here. 

Print # 1

Print # 2

Print #3


Print Style
art #print #sale for #SheavesForChrist all prints $12 shipped in USA $14 for international. There are 5 of each of the prints available.
The prints will be shipped at the end of the week.
Or if you would like to donate to the cause you can choose any amount and donate here:

Friday, June 21, 2013

Digital Scrapbook Week Day 5

I hope that you have enjoyed this week of Digital Scrapbooking and I hope you will come back next week for a week of Art Journaling inspiration. 

This page is for my personal yearbook. I created this one to capture my day the Atlanta America's Mart. I had a great time that day working on marketing my art. 


This page was created to add to my yearbook as well. I love My Cowboy. 

Thursday, June 20, 2013

Digital Scrapbook Week Day 4

Today's pages are challenge pages also I really like the challenges and I have so much fun doing them I finish them all too quickly. 

This page is for the Template Challenge. For the month of June the template is free for  you to download. 

This was the Random Challenge page for the month of June. 

Wednesday, June 19, 2013

Digital Scrapbook Day 3

Today's pages were created for the June challenges over at The Lily Pad
This page was created using items from the June BYOC (Build Your Own Collaboration) 

This page is a mish-mash of various different kits from The Lily Pad

Tuesday, June 18, 2013

Digital Scrapbook Week Day 2

For day two I wanted to feature two pages that I created from the rodeo that we attended last weekend. I took a lot of pictures and I still have more to scrap. All of the elements that were used on these pages were purchased from The Lily Pad Shop. I really enjoy the forums over there and I think that you would enjoy them also. The gallery is very inspiring and I really think you can find some great pages to Scraplift. 


Monday, June 17, 2013

Digital Scrapbook Week Day 1

Welcome to day one of Digital Scrapbook Week. This week I will be sharing layouts that I have created over the past few weeks and I hope that you enjoy them. I have been creating each of these pages with items from The Lily Pad shop. I really love this shop and I have not be paid for these post I just really love them. 


I love to create pages for each of my girls for the yearbook that I am working on for each of them. 


The pictures for these pages were taken at the zoo and I really like how the light played on each of them. 

Thursday, June 13, 2013

Painting Week Day 4

Today I thought I would share some of the painting that I have created over the past few months. I hope you enjoy these and I would love to hear  your comments. 

Untitled

Here are the ones from yesterday after adding a layer with the #gelliarts printing plate #mixedmedia #pink #orange #yellow #green #teal

In natural light #painting #mixedmedia

Large scale painting with more layers added Untitled

Untitled

Untitled

finished #home is where the #heart is #mixedmedia #collage #painting

Untitled

I hope you come back and join me for the last day of Painting Week tomorrow.

Wednesday, June 12, 2013

Painting Week Day 3

Welcome to day 3 of Painting Week. I hope you have enjoyed the week so far. Today's post will feature one of 
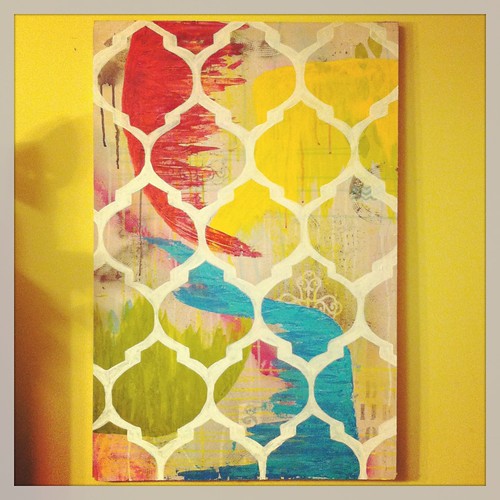
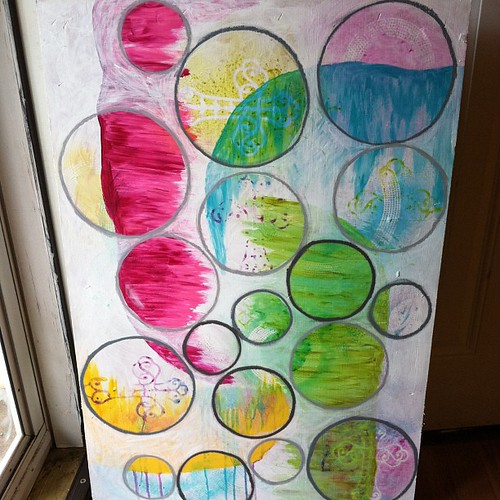
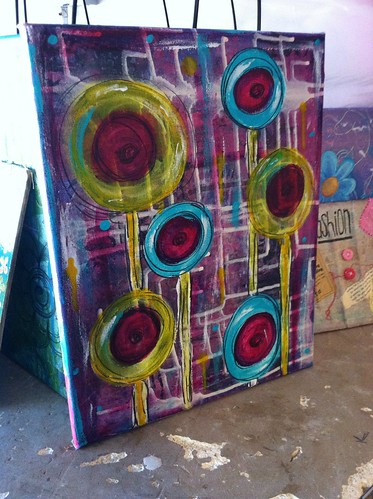
my latest paintings that I have created for the 10 x 10 series. This painting is bright and colorful and full of lots of fun layers. 


Supplies: 
  • 1 10 x 10 primed canvas
  • 5 colors of bright paint (should include black and white also)
  • 1 Large Black waterproof Chisel Tip Marker 
  • A few various sized brushes (not shown)
  • The best tool of all to paint with ( Your fingers and hands)


 Start by adding some messy layers of paint and drippy paint letting each layer dry in between. I f you do not let it dry in between each layer you will only get mud, and there will not be these pretty bright layers of color.


 Next, after letting it dry for at least 3 hours,  I got out my Bic Mark-it Chisel tip marker and drew some shapes that I liked over the messy layers. (I forgot to take a picture at this step because I got so caught up in the process.)


I then started to work my way across the canvas adding a rainbow of colors. These layers are semi-transparent so that the messy layers will show through. This is achieved by using the tube paints that are on the more professional side. 
I then started adding come white back in with a small paint brush. I also added a little bit of drippy white on top to bring out the contrast. (I  didn't worry about the black lines because I will draw them back in, in the final steps.) 

Once I was satisfied with the white contrast, I let it dry over night. Then I added the black lines back with the chisel tip marker.
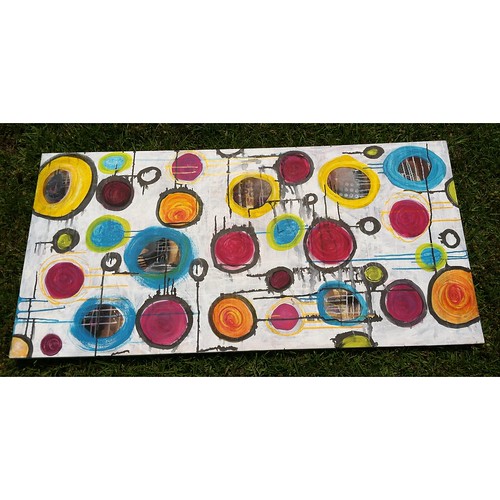
Here is the completed piece.

Tuesday, June 11, 2013

Painting Week Day 2


Painting Week Day 2: Painting with markers on canvas. 

 Supplies:

  • 1 - 10 x 10 inch canvas
  • 4 Prismacolor Markers of your choice I used a couple of shades of pink, a green, and an orange. 
  • 1 Faber-Castell Big Red Marker

 This canvas is a doodle canvas and I know that it is not technically a painting but since it is on a canvas I thought I would share it.

I started it off with the small flowers and started to fill in the entire surface. I used different flowers that I like to draw. I added in some circles and then outlined them with the large red brush marker. 

This was a really fun canvas to create. I originally planned on this just being a under layer that I would paint over, but it turned out more to my liking and I decided to just work it into a finished piece. I might used the markers to color the edges so that I can just hang it as it is. 

I hope that you are enjoying this series and come back tomorrow for Day 3 of Painting Week

Monday, June 10, 2013

Painting Week Day 1

Today is day one of Painting Week here on A Southern Lady's Ramblings. I hope you enjoy what I have planned for the week.

Today I would like to share a few blogs that inspire me.


Chrissie Grace of In His Grace


Roben-Marie Smith


I hope you enjoy taking a look around these beautiful blogs and are able to gather some inspiration as I have. Leave them some comment love and let them know that I sent you. I hope you come back tomorrow for a marker on canvas painting. 


Related Posts Plugin for WordPress, Blogger...
Ebates Coupons and Cash Back