

Hello & welcome to our April #SMBiGblog hop! Each month we feature one of our favorite companies, and host a blog hop of inspiration, showing off the products and our designers, as well as a guest from the company. THIS month, we were lucky enough to have the entire Chic Tags team join us for a BLOGAPALOOZA-- over 20 projects to inspire you to get those Road Trip goodies out & start creating! Travel along with us, starting at the Chic Tags blog, here. There are almost 30 different bloggers so here is a list of who is before me and who is after me along with the two main sites. if you go to the SMB Blog you will find a list with links to all of the blog participants.
- Chic Tags blog **GRAND prize
- CT Kasia **prize
- ME YOU ARE HERE
- Caz ***prize
- SMB blog
Along the way there are plenty of prizes and freebies --- Diecuts, printables and chances to win some of your favorite Road Trip paper goods, and one GRAND prize winner of the Road Trip, Everyday Life II & Birthday Wishes collections ! ! ! ! ! ! Good Luck, and have fun hopping! If you would like to purchase some of these adorable products, head on over to the Chic Tags website !
Ok, here is my contribution to this hop.
I created a tutorial using the Chic Tags cut files, and how to use the trace function in the Silhouette Studio to create a layered tag that can be used for multiple projects. I hope you enjoy and find this tutorial helpful.

Once you have added the cut file to to your library open it into a new file.

Using the trace function select the area to trace. Un-click the "High-Pass-Filter" and increase the threshold to 100%. Click trace.

Now you can delete the original image and keep working the next steps with the traced image.

Now you are going to retrace the image. Un-click the "High-Pass-Filter" and increase the threshold to 100%. This time click Trace Outline, and only the outside will be cut.

Now you have to separate sets of 6 circles to cut.

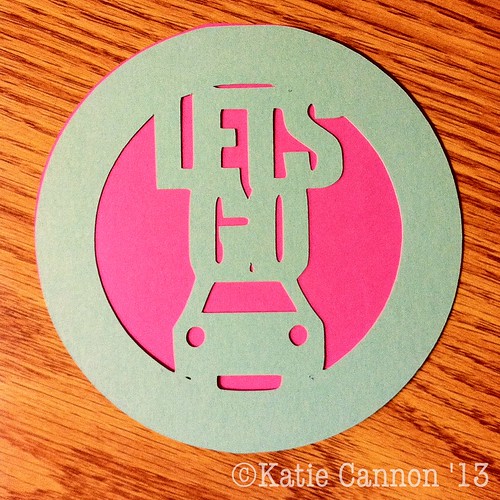
Next I cut them from 2 different colors of cardstock and once the were cut I layered them to create these tags.

I made a few of these and they are now ready for layouts.
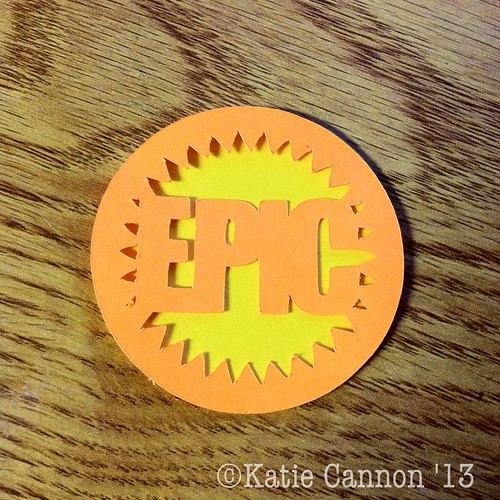
Here is a closeup of the detail. I really like these files.

For these next tags I increased the size of the image by 200% and they turned out to be the perfect size for luggage tags.
Because of the way the tags cut you need to cut them out of two different colors so I ended up with this one also. I will be taking them to be laminated today after I write the contact information on the back.

Here you can see how much bigger the luggage tag is from the page tag.

32 comments:
Спасибо за мастер класс!
the cute files are awesome...I just can't use them yet..maybe some day LOL
I regret that I haven't got Silhouette :(
LOVE these cuts! Thank you so much!!!! xo
Love these cuts! Thank you so much!!!!! xo
Your cut tags are so adorable! LOVE♡
Happy to be hopping along with you today Katie, aren't those files great?!
Sherri - Chic Tags DT
love those files and my Silhouette! Couldn't scrap without it! Thanks for the tutorial. I am certain many will benefit from it! :)
I don't have silhouette, but thanks anyway :)
maybe one day...
ciao
These are so cool - Thank you for sharing!!
Love those circles!
Love the circles
So fun!
So so fun!
Great tutorial! I have a Silhouette on the way, so this is definitely going to come in handy!
awesome, i love them
LOVE these cuts! Thank you so much!!!!
Thanks for the tut!
Thanks for the tut!
Thank you for the tutorial. What a excellent idea on enlarging the cut-outs, laminating them and using them as luggage tags.
Awesome cuts! Thanks for the tutorial!
Great tutorial!
Thanks for the tutorial. I will definitely come back and read through. The cut files are awesome!
thanks for the tutorial!!!!! had fun blog hopping with you today!
Thank you so much and thanks for the tutorial.
mi piacciono i blog hop. si conoscono tanti nuovi blog. marta
Your cut files are so cute!! Love them!!
Thanks for tutorial!
Great project-thanks for the tutorial :)
I don't own a Silhouette (yet) but I'm bookmarking your tutorial for when I do! Thanks so much for sharing!
Great tutorial on tracing and love that cut file!
thank you for the tutorial!
Post a Comment